Mobile Application Security Assessment – Proxying for IOS (iPhone & iPad)

After an oversight on how to set up Proxying on Android devices and emulators for Application security assessment, let us shed some light on doing the same for iOS devices.
Setting up proxy on an iPhone and iPad is fairly simple. We will follow this simple algorithm:
- Install proxy certificate on the device
- Specify proxy settings on the device
- Start the HTTP proxy
Now to actually get this done, do the following on your device:
Generate SSL certificate of Proxy
Steps to configure Firefox to use Burp as proxy:
1. In Firefox, go to Tools->Options->Advanced.
2. Click on “Network Tab” and then on the first button that says “Settings”
3. Set up proxy IP and Port as shown in the image
4. Start Burp Proxy and make sure it is listening on port 8080
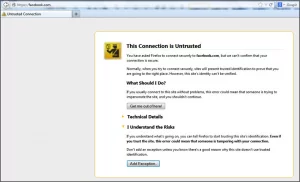
5. Now, visit any HTTPS site, e.g. https://facebook.com on Firefox
6. You will be displayed with an “Untrusted Connection” page
7. Click on “I Understand the Risks” -> “Add Exception”
8. On the “Add Security Exception” window, click on “View”
9. On Next Window, Click on : “Details” tab and then on “Export”
10. Save the certificate as “Burp_Suite.crt” and rename to “Burp_Suite.cer”
For CharlesProxy, download the certificate from http://charlesproxy.com/charles.crt
Installing Proxy Certificate on device
Just transfer the certificate from workstation to device (via email, ftp, ssh etc.)
Once transferred, navigate to the transfer location and tap on the certificate file. The device will prompt to trust the certificate. Just allow the installation, and device will trust the certificate for any future connections.
Setting up device to proxy traffic
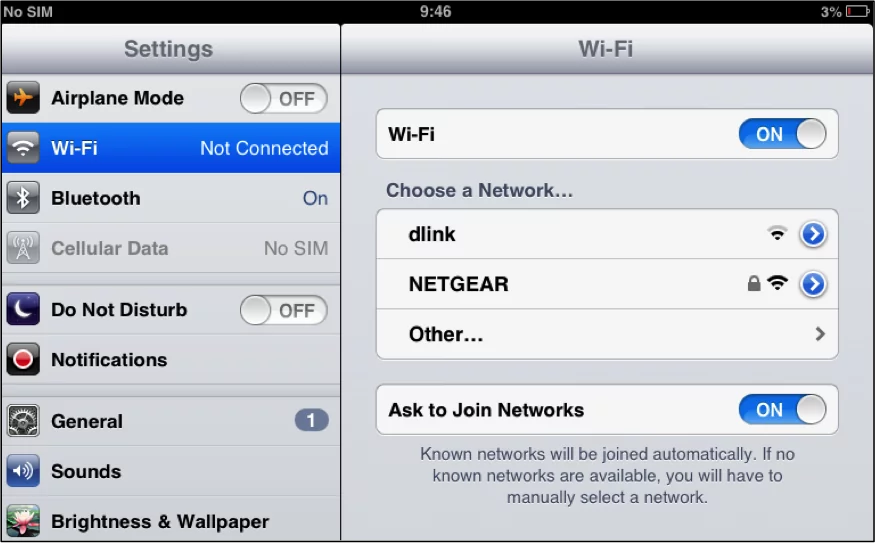
1. On iPhone/iPad, navigate to Settings->Wifi
2. Tap on the “>” sign to the right end of the WiFi network to which we wish to connect
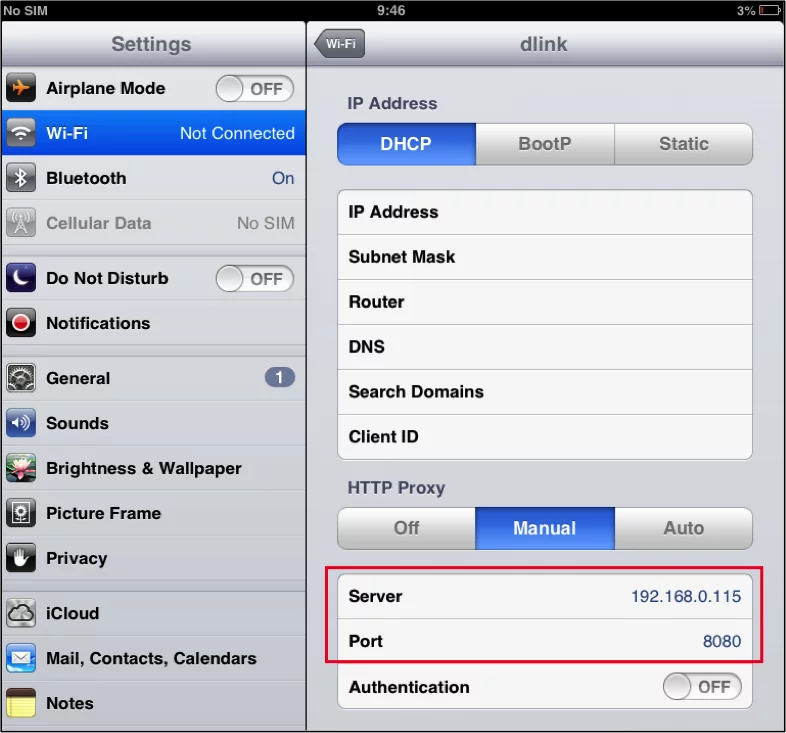
3. Under HTTP Proxy, click on “Manual”
4. Enter Proxy IP and Port (e.g. xxx.xxx.xxx.xxx:8080)
The application/browser Http/Https traffic can now be intercepted with ease.


