Android Pentesting Using Frida

In this blog, we were going to see what Frida is and how to set it up in our systems. We will also perform android pentesting using Frida.
What is Frida?
Frida is a dynamic code instrumentation toolkit that permits you to inject snippets of JavaScript or your library into the native application on your operating systems like Windows, iOS, Android, and more. It is used to hook into the running process of the application and modify the code on the fly without any requirement for re-launching or re-packaging. You can find more details about Frida here – Frida.
Installation Procedure:
Installing Frida tools is pretty much simple but to ensure the seamless installment procedure, you need to fulfill the below requirement of tools for Frida.
- The latest 3x version of Python is highly recommended.
- Windows, macOS, or GNU/Linux supported OS.
Using the PIP command as recommended on the official website, install Frida on your operating system.
#pip install Frida-tools
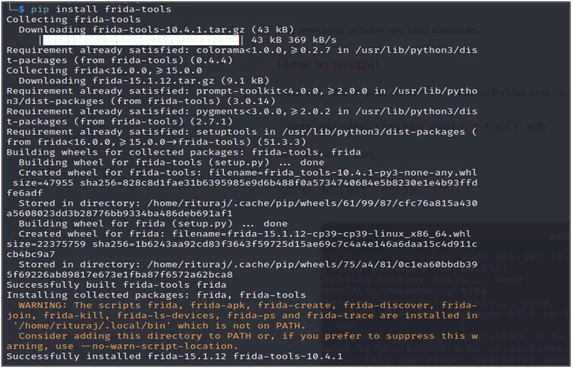
Fig 1: Installing frida-tools
Once Frida is successfully installed in the system, you will have to open up your command prompt and identify the version by using the below command:
#frida –version

Fig 2: Latest frida version
To install the server, you need to browse for the new releases on GitHub and download the file depending upon your mobile device’s platform and of the version shown above.

Fig 3: Frida server files to installed in android device
Download the file and then extract it. Then, you will have to move it to your mobile preferably /data/local/tmp as shown below.
![]()
Fig 4: Push to folder /data/local/tmp
With the command mentioned below, modify the permissions for the Frida-server binary and run it.#chmod 755 frida-server
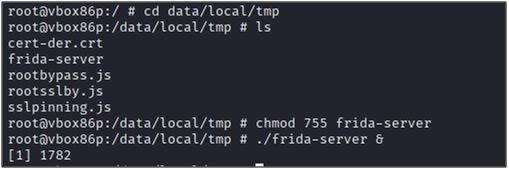
Fig 5: Giving executable permission
Now, open your desktop, enter the command mentioned below to test the connection with your Frida-server
#frida-ps –aU
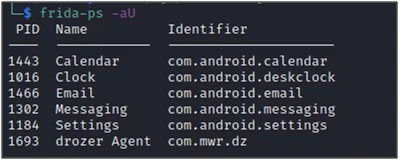
Fig 6: Android application process
Our setup is now complete. So, let’s begin using Frida for assessment.
Test Case 1: Root Detection Bypass Using Frida
What is root bypass?
While developing an application, the developers integrate the root mechanism to stop the user from using it. When a user tries to install some application, it throws an error message and doesn’t allow the application to install on a rooted device. We make changes in the code while performing the root bypass. This is done to restrict the app from shutting down as it further leads to application installation on the rooted android device.
Let’s look into a practical demonstration of a root detection bypass in the testing app. Open the testing app on your android phone and it says this device is rooted. You can’t use this app.
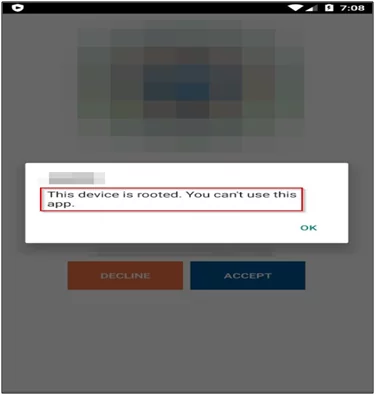
Fig 7: Device is rooted
Below is the root detection protection source-code screenshot
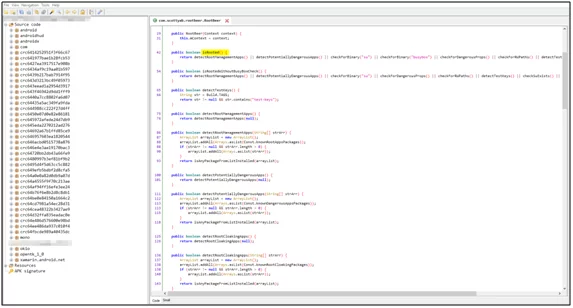
Fig 8: Root detection implemented in code
Using the code mentioned below, we bypass the root detection logic. The code is available here.
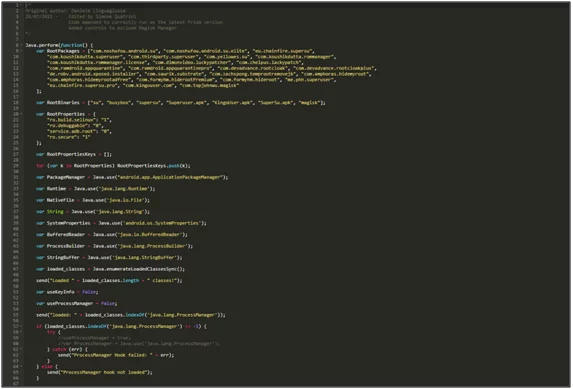
Fig 9: Javascript code for root detection bypass
Let’s run this script with this command #frida –U –f com.example.app rootbypass.js script –no-paus. It has successfully bypassed the root detection of the android app as shown in the below screenshot.
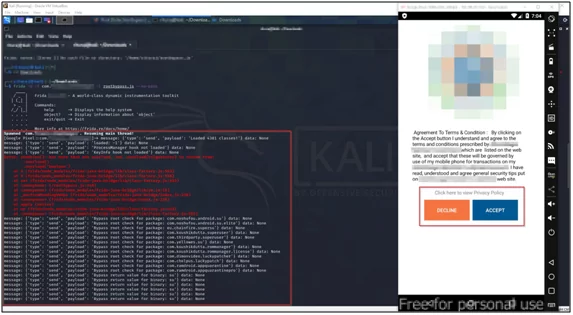
Fig 10: Root detection bypassed
Test Case 2: SSL Pinning Bypass Using Frida
What is SSL Pinning?
SSL pinning only acknowledges the predefined or valid public key or certificate for any application. It is an additional security layer that is used by the developer for secure app traffic. The application trusts the custom certificate and the app to interrupt the traffic. During the implementation of SSL pinning, the app does not validate the custom certificates and does not authorize the proxy tools to intercept the traffic.
SSL pinning bypass we have to push two things into the android device:
- BurpSuite Certificate

Fig 11: Pushing burpsuite certificate
- SSL Pinning Bypassed JavaScript (Frida script we can find here)

Fig 12: pushing frida script
Now let’s try to bypass the SSL Pinning of an android application. Firstly, we need to find out the id of our target application. Then, we will list all running services on devices including your application process.
Now, run this command in your terminal — #frida-ps –aU
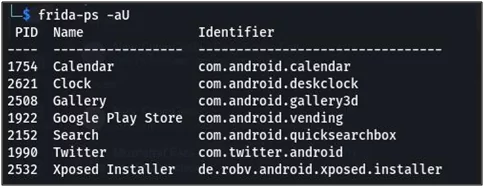
Fig 13: Twitter PID and package name identifier
After that hook fridascript.js and certificate file into android device and run this command –
//frida -U -f <your_application_package_name> -l <path_to_fridascript.js_on_your_computer> –no-paus
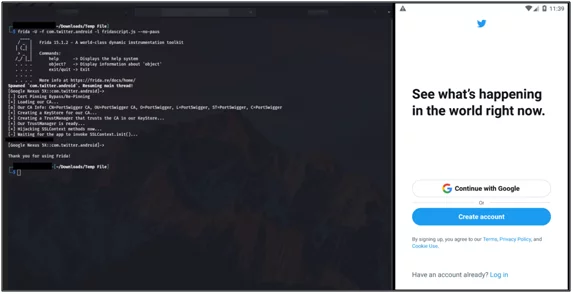
Fig 14: SSL pinning bypassed
We have successfully bypassed the SSL Pinning and intercepted the traffic in Burp Suite.

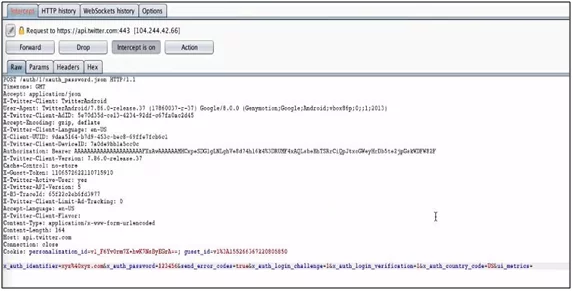
Fig 15: All request traffic in Burp Suite
Conclusion
In this blog, you read about carrying out the android pentesting using Frida. There is penetration method like android penetration testing with drozer, AWS pentesting, and much more that you can read in our blog section.
References:
https://httptoolkit.tech/blog/frida-certificate-pinning/
https://arben.sh/bugbounty/Configuring-Frida-with-Burp-and-GenyMotion-to-bypass-SSL-Pinning/
https://www.youtube.com/watch?v=dqA38-1UMxI
Author,
Rituraj Vishwakarma
Associate Security Consultant,
Attack & Pentest Team,
Varutra Consulting Pvt Ltd.


